 When building a new home, proper alignment of the primary air barrier and thermal barrier is critical to maximizing performance and comfort. By following best practices, you can reduce the amount of air changes per hour, ACH, for a tighter, more efficient home that meets Energy Trust’s EPSTM requirements of less than four air changes per hour. In most cases, the first step to locate of the primary air barrier is to target the exterior sheathing.
Given the number of subcontractors who work on a house, it’s important to coordinate so that the primary air barrier is defined, and other subcontractors understand their role in creating and maintaining it. Each crew often needs to cut holes in the framing to route their equipment, creating penetrations where air can move unimpeded and increasing air leakage rates. Even skilled sealing crews can have difficulty sealing every area that’s been cut. Installing the primary air barrier at the exterior sheathing will circumvent potential issues that arise from relying on the air sealing crew or others to meticulously seal as they move through the home.
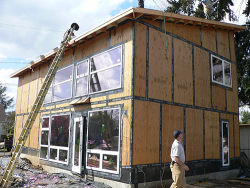
Exterior sheathing is a logical and effective place to accomplish air leakage reduction because the sheathing is a continuous visible plane. Best results are achieved by taping the seams of sheathing, foaming penetrations that were created in the shell and between a conditioned and unconditioned space, and adding sill sealer to the top plate to adjoin the Sheetrock. Finally, the home is air sealed within the envelope as an extra measure to reduce any other leakage, such as convective movement between floors.
For more information about air barriers and how to achieve other energy-saving EPS requirements, download a copy of the EPS Field Guide or call Energy Trust’s trade ally coordinator at 1.877.283.0698.