For most older homes, adding attic insulation is the best cost-to-benefit energy efficiency measure. Adhering to Energy Trust of Oregon’s kitchen and bath fan exhaust specifications helps prevent moisture buildup in insulated attics that can lead to biological issues, such as mold, and damage to building materials.
When insulation is added to attics, fans that exhaust into the attic are even more likely to cause moisture problems. Ducting existing kitchen and bath fans to the outside of the building will help prevent moisture damage to building materials and biological growth in attics.
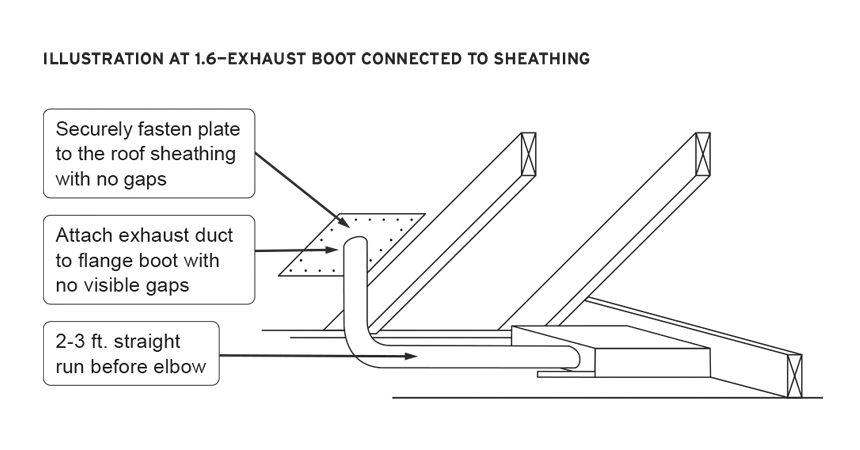
Energy Trust’s 2025 Specifications Manual requires trade allies to vent exhaust fans to the exterior of the house. Sections AT 1.6 and AT 1.7 state that “exhaust fans shall be vented to exterior of the structure and secured to the exterior sheathing with no gaps” using mechanical fasteners. A functioning damper must also be present for each fan. (Note: This is not a complete list of exhaust fan requirements.)
Trade allies can avoid corrective actions and save time for themselves and customers by following the exhaust fan requirements detailed on page 19 of the 2025 Specifications Manual. The manual also addresses other common requirements to ensure projects maximize comfort, efficiency and savings.
If you have questions, please call Energy Trust’s Residential trade ally team at 866.365.3536.